What's New - Quilting Fabrics


Social Media

Quick and Easy Jelly Roll Quilt Design - Week 2

How did the first week go?  Did you get all of your strip put together and cut into 14" x 14" squares.  I have had some quilters say that their squares were a bit bigger but as long as they are square we can make adjustments at the end. 

Again, I chose to use a Happy Go Lucky Jelly Roll by Bonnie and Camille.  I had so much fun piecing the strips together and just love the way the colors all came together.  The pattern for the squares was derived from a free pattern I saw on 3dudesquilting.com.  They have several other free patterns so check out their site when you have a chance.

Just to recap...this QAL requires 1 jelly roll plus 2 extra 2.5" strips for a total of 42 strips plus approximately 3 1/2 yards for backing and binding.  It's a Quilter's Choice so grab a jelly roll from your stash or go to 1 Choice 4 Quilting for your fabric supplies.  Comment below as to which fabric line you choose to use. 
 
The QAL will run from today on the following schedule:
Week 1 - piece and cut the strips **complete**
Week 2  - cutting and piecing the squares
Week 3 - finishing the quilt top
Week 4  -quilting
Week 5 - Backing and Binding (optional) but be sure to post your finished Quilt top on the 1 Choice 4 Quilting Group Flickr page by Memorial day for chance at winning an exclusive 1 Choice 4 Quilting Red, White and Blue Fat Quarter Bundle.

Step 5
Now that you have all your strips cut into 12 squares and pressed, take two of the squares and lay them flat print side up for both with one laying with the strips facing vertically and the other horizontally. 


Step 6
Take the one on the right and flip it over to the left so that they are now facing each other with the print sides together.


Step 7
Sew your two squares around the perimeter completely sewing them together.

 Step 8
Lay your fabric back down on your cutting mat.  If your cutting mat has a diagonal guide that will be great.  If not just use a rotary blade and a straight edge to cut your fabric on a diagonal from the bottom left to the top right and again from the bottom right to the top left in a "X" formation.


Step 9
 Open and press your pieces.  


Can you believe your strips transformed into this?

Step 10
You can now put them back one of two ways.  
The first is with the small triangles meeting in the middle.  


The second is with the triangles out at the four corners.  Either way you piece them together is fine. 


I am adding this as a third way I found to piece your squares back together....did you find any?  Please share your piecing!  I actually think this may be my favorite way.  What a discovery!

 
 You can even mix and match your 14" square pieces for variety.  There is no right way.  

Repeat steps 5 through 10 until you have 6 large squares measuring approximately 18" x 18".

Now you know why I didn't want to give away the reveal!  Doesn't it look like you spend so much time on piecing this together when it was just a few cuts of the rotary blade and waalaa! 

Can't wait to see your progress.  
Feel free to post anytime on the Flickr 1 Choice 4 Quilting Group Page!! 

And as always comment below with any questions!
Thanks for Quilting Along!


Quick and Easy Jelly Roll Quilt Design - Week 1


This is going to be an amazing quilt. When finished this quilt will look like you spent months working on it but actually it will only take you a few short weeks or less.

For this quilt I chose to use a Happy Go Lucky Jelly Roll by Bonnie and Camille.  I absolutely adore the colors.  We often lead very busy lives and need a thoughtful yet quick gift to give a friend or a family member. Quilts are perfect because they are made from the heart with love and become something to cherish for many years to come.

This QAL requires 1 jelly roll plus 2 extra 2.5" strips for a total of 42 strips plus approximately 3 1/2 yards for backing and binding.  It's a Quilter's Choice so grab one from your stash or go to 1 Choice 4 Quilting for your fabric supplies.
 
The QAL will run from today on the following schedule:
Week 1 - piece and cut the strips
Week 2  - cutting and piecing the squares
Week 3 - finishing the quilt top
Week 4  -quilting
Week 5 - Backing and Binding (optional) but be sure to post your finished Quilt top on the 1 Choice 4 Quilting Group Flickr page by Memorial day for chance at winning an exclusive 1 Choice 4 Quilting Red, White and Blue Fat Quarter Bundle.

The first step in the process is to untie that beautiful jelly roll.  I know it's hard but the fabric is even prettier when it's unraveled.

Now I always like to separate my strips by color so it's easier to color coordinate them against each other as I like to use one strip from each color family in my grouping.

Step 1
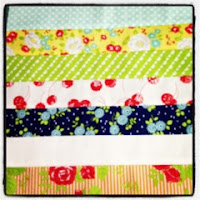
Now that you have them separated, choose 7 strips and lay them next to each other.  Love the way they look?  Then using a 1/4" seam, start sewing them from end to end making sure you are sewing them print to print.
Step 2
Once you have sewn your strips together grab your iron and flatten the seams either all towards each other or steam open.  This depends on your preference. You'll have to re-iron next week.
 
 Step 3
Next place your fabric flat on your cutting table.  Trim off the selvages from both ends. 
Step 4
The width of your strip should be 14".  Making an exact square by cutting your long strip at 14".  Repeat this step so you have two squares measuring 14" x 14". 
Keep the remaining piece as we will use it later. 

Repeat steps 1 through 4 until you have 12 squares measuring 14" x 14".
I specifically did not include finished pictures because the reveal of these quilt squares next week is just too exciting to giveaway!  Can't wait to see your progress.  Feel free to post anytime on the Flickr 1 Choice 4 Quilting Group Page!! And as always comment below with any questions!

Thanks for Quilting Along!

Jelly Roll Jubilee winner

How exciting it is to read all of your responses to the question: What is your favorite precut? Or what pre-cut would you like to learn more about? Jelly rolls made the list as answers to both questions. So if you are interested in learning more about jelly rolls and how they can be used be sure to join us for a QAL beginning next Monday, April 22.

And now for the winners:


The first Jelly Roll winner is: 


The second Jelly Roll winner is:
And you just won a jelly roll from the festive Aspen Frost collection by Basicgrey.

Tina....turnovers sounds like a great future tutorial idea =)

Congrats winners!! To give everyone a chance to grab a jelly roll I am the keeping the jelly rolls on sale at 20% off through Saturday!  No coupon needed & shipping is always free on orders over $50!  

Join me back here on Monday for the Jelly Roll Jubilee tutorial!!

Jelly Roll Jubilee Giveaway, Sale and QAL

Wow it appeared for a minute as though spring had sprung here on the east coast.  It was warm & sunny for three days straight.  Today it's cold, rainy & blustery, appearing to be winter again.  

So since nature can't decide what season it should be 
I've decided to give away not one but two jelly rolls.  
 

The first will be the Spring Jelly Roll from the collection 
Happy Go Lucky by Bonnie and Camille.

The second, will be the Winter Jelly Roll from the collection 
Aspen Frost by BasicGrey.  
Both are completely different in color and patterns and offer their own unique beauty 
just like the seasons of the year. 

In addition all Jelly Rolls are 20% off! No coupon needed!

<------------- Start shopping Jelly Rolls here ------------->

Entering the giveaway is simple!   
Leave a Comment below answering either or both of the questions:

What's your favorite go to pre-cut? 
Which pre-cut would you like to learn more about?

Giveaway and sale ends at Midnight EST on April 17th!  Winner to be announced 
on April 18th at noon so be sure to check back!
Another special thank you to Jess at QuiltyHabit for sharing her lovely Argyled Quilt using Honey Honey by Kate Spain!  The winner of the quilt top flickr post was Misty!  
She won a $25 gift card to 1 Choice 4 Quilting.  
And last but not least the Jelly Roll Jubilee QAL....grab your jelly roll now and 
join me for a month long tutorial on jelly roll quilting.  
More details to come with the giveaway announcement!
Have a great weekend!! 


Why Choose Us?

Because we promise you:
  • We will find patterns and kits that work with your busy schedule.
  • We will find tools that help you save time.
  • We will find you precut or bundled fabrics that will save you time and money.
  • We will give you free shipping on all domestic orders.
  • We will ship all items USPS Priority Mail. This saves money and in most cases will arrive to your home in 1-3 business days.
  • We will ship your order the same day if purchased by 4:00 PM Eastern Monday through Friday.
The most important promise of 1 Choice 4 Quilting -

We will give you the absolute BEST customer service!

-

We are #1 in Customer Service - We have been operating online stores for over 10 years. Our customers all agree that 1 Choice goes above and beyond to make sure that you, our customer, is always put first. Shop online 24 hours a day 7 days a week for all the quilting fabrics you need. We use the most sophisticated and secure online shopping cart provided by Yahoo! We accept Visa, Mastercard, American Express, Discover, and PayPal. Most orders are shipped the same day they are received* and will arrive at your doorstep in perfect condition....GUARANTEED!

Company Info:
About Us
Contact Us
Blog
Twitter
Facebook
Store Information:
FAQ
Shipping
Privacy Policy
Site Map
Affiliate Program
Quick Links:
Jelly Rolls
Layer Cakes
Charm Packs
Fat Quarter Bundles
Quilt Kits
ecommerce provided by Yahoo! Small Business

Social Media