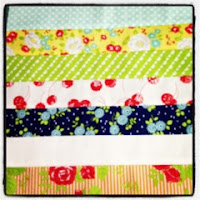
 This is going to be an amazing quilt. When finished this quilt will look like you spent months working on it but actually it will only take you a few short weeks or less.
For this quilt I chose to use a Happy Go Lucky Jelly Roll by Bonnie and Camille. I absolutely adore the colors. We often lead very busy lives and need a thoughtful yet quick gift to give a friend or a family member. Quilts are perfect because they are made from the heart with love and become something to cherish for many years to come.
This QAL requires 1 jelly roll plus 2 extra 2.5" strips for a total of 42 strips plus approximately 3 1/2 yards for backing and binding. It's a Quilter's Choice so grab one from your stash or go to 1 Choice 4 Quilting for your fabric supplies.
The QAL will run from today on the following schedule:
Week 1 - piece and cut the strips
Week 2 - cutting and piecing the squaresWeek 3 - finishing the quilt top
Week 4 -quilting
Week 5 - Backing and Binding (optional) but be sure to post your finished Quilt top on the 1 Choice 4 Quilting Group Flickr page by Memorial day for chance at winning an exclusive 1 Choice 4 Quilting Red, White and Blue Fat Quarter Bundle.
The first step in the process is to untie that beautiful jelly roll. I know it's hard but the fabric is even prettier when it's unraveled.
Now I always like to separate my strips by color so it's easier to color coordinate them against each other as I like to use one strip from each color family in my grouping.
Step 1
Now that you have them separated, choose 7 strips and lay them next to each other. Love the way they look? Then using a 1/4" seam, start sewing them from end to end making sure you are sewing them print to print.
Step 2
Once you have sewn your strips together grab your iron and flatten the seams either all towards each other or steam open. This depends on your preference. You'll have to re-iron next week.
Step 3
Next place your fabric flat on your cutting table. Trim off the selvages from both ends.
Step 4
The width of your strip should be 14". Making an exact square by cutting your long strip at 14". Repeat this step so you have two squares measuring 14" x 14".
Keep the remaining piece as we will use it later.
Repeat steps 1 through 4 until you have 12 squares measuring 14" x 14".
I specifically did not include finished pictures because the reveal of these quilt squares next week is just too exciting to giveaway! Can't wait to see your progress. Feel free to post anytime on the Flickr 1 Choice 4 Quilting Group Page!! And as always comment below with any questions!
Thanks for Quilting Along!


Hi. I have started to piece this, but I'm a bit short on the length of one block, as I had to piece a couple of strips for layer cakes. When you say you will use the piece that remains when you cut the 14 inch blocks, how much will you use? One of my remainders blocks will be 5 inches shorter than the rest.
ReplyDeleteI too did not have enough strip sets to make 12 blocks. Are jelly rolls different sizes? I can cut some more strips from my stash, but wondering about the shortage. We only cut 2 blocks from each set and save the rest of each set?
ReplyDelete@Dianne - It shouldn't be a problem it is for a piano key design on the backing so we can make an adjustment when we get to that part.
ReplyDelete@Sharon yes some are. Most Moda jelly roll are 40 strips so you will need a jelly roll plus 2 additional 2.5 x 44" strips. I just used solids that coordinated since I needed a number evenly divisible by 6, so I went with 42.
Thanks for quilting along.
Just finally found your home page and see the answer to my question. Thanks for sharing this info.
ReplyDeletePam Frederick
pamfrederick@gmail.com
I think your math is off, or I'm reading the instructions wrong. Shouldn't the cut blocks measure 14.5 inches? Seven strips 2.5 inches wide sewn side by side with a 1/4 inch seam would equal 14.5 inches wide. When you say 14 inches, are you referring to the finished size? Or am I just really misunderstanding?
ReplyDelete